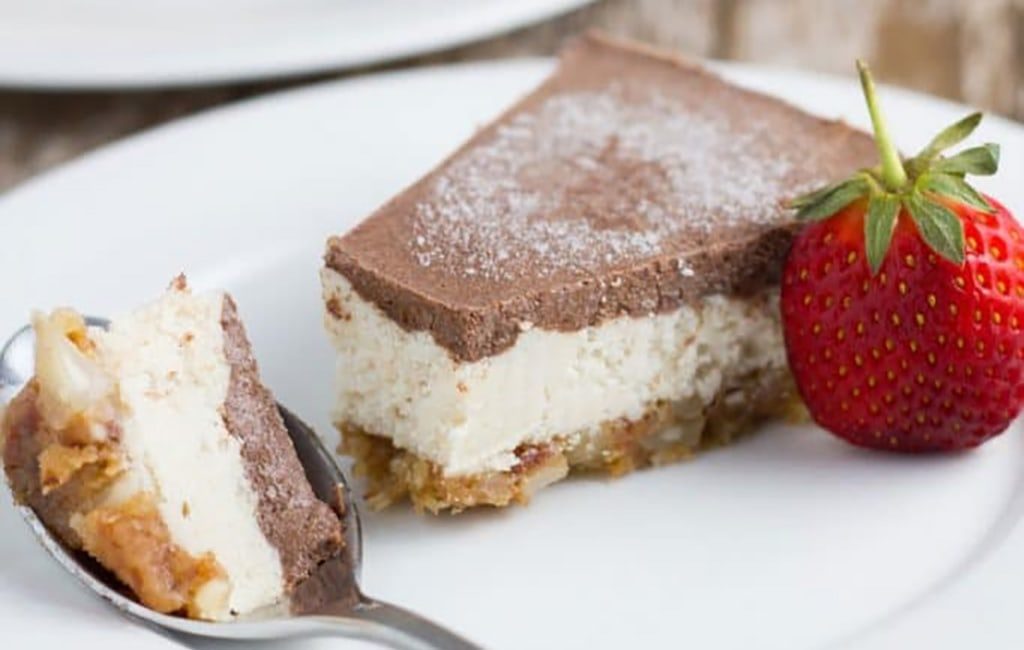
You can still enjoy Easter chocolate
Well, Easter is here again. Doesn’t it come around quickly? Another time of the year when you are tempted by sugar laden treats!
How on earth are you going to get through it without eating a mountain of all the yummy Easter eggs that are around?
Well it might not be as difficult as you think. Just because you are looking to stay healthy over Easter doesn’t mean that you can’t enjoy some healthy alternatives. By all means, have a small amount of chocolate – it is Easter after all – and we wouldn’t recommend depriving yourself completely as that will only make you want more, and you’ll probably end up overeating.
Make better chocolate choices
Just be mindful of the amount that you are eating and make sure you don’t decide to eat a chocolate egg when you’re hungry as you will probably eat more than you would when you’re not. Make sure you eat it slowly and enjoy every mouthful. Try eating it at the end of a meal instead of having it as a snack as you’re likely to eat less and also, the food in your digestive system will slow down the release of the sugar into your blood stream, reducing blood-sugar spikes.
Choose dark chocolate over milk chocolate. Dark chocolate is much better for you and isn’t overloaded with milk solids, sugar and cream like milk chocolate is and, as it tends to be very rich, you won’t want to eat too much of it. Also, try having individually wrapped chocolates as it will help you to resist the temptation of finishing an opened large egg!
Easter exercising
As well as eating healthily over the Easter break, try to stay active too, whether that’s by coming to the gym (yes, we are open with reduced hours over Easter – so no excuse not to!) or playing with your kids (take them to the park and join in on the monkey bars or the see-saw) or take them swimming. As the clocks have now moved forward, make the most of the lighter nights and go for a walk after tea if you don’t have the time earlier in the day.
A great idea is to organise a healthy Easter egg hunt. You could hide a healthy alternative to chocolate eggs (see recipe below) or you could hide little presents with one main prize of a chocolate egg.
Our Easter home workout
- Burpees X 20 seconds followed by 10 seconds rest (repeat 4 times) = 2 mins
- Mountain Climbers X 20 seconds followed by 10 seconds rest (repeat 4 times) = 2 mins
- High Knees Running X 20 seconds followed by 10 seconds rest (repeat 4 times) = 2 mins
- Squats X 20 seconds followed by 10 seconds rest (repeat 4 times) = 2 mins
- Standing Oblique Crunches X 20 seconds followed by 10 seconds rest (repeat 4 times) = 2 mins
The workout should take 10 minutes but if you want a more intense workout, then repeat the programme twice.
Easter Recipes to satisfy your sweet craving
We have found some super recipes to share with you which are refined sugar free and which taste amazing. One of these will satisfy your sweet craving without upsetting your healthy eating regime.
Guilt-free sweet treat Recipes
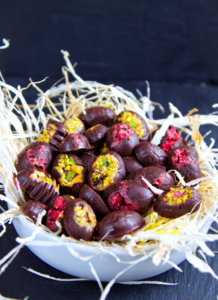
Mini Eggs (Great for Easter egg hunts)
- Healthy Living James
- You will need Easter egg moulds for this recipe (You can get them from Lakeland)
- Portions: Roughly 15 Mini Eggs
- Prep: 5 mins
- Freezing: 30 mins
Ingredients:
- 5 tbsp coconut oil, melted
- 5 tbsp maple syrup
- Pinch of salt
- 40g cacao powder
Optional Ingredients:
- Crushed pistachios
- Crushed Frozen raspberries
Method:
- Add the melted coconut oil and maple syrup to a Bain Marie and mix together
- Slowly add the cacao powder whisking until you have a smooth mix
- Add a pinch of salt and mix in
- If adding pistachios or raspberries add these into the moulds now before adding the chocolate
- Pour the chocolate mix into your mini egg moulds
- Place in the freezer for 20-30 minutes or until firm
TIP: These will keep in the fridge for up to a week in a sealed container.
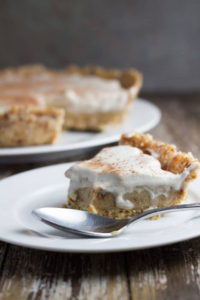
Banoffee Pie
- Author: Vanessa Vickery
- Prep Time: 30 minutes
- Cook Time: 0 minutes
- Total Time: 30 minutes
Ingredients
Base
- 12 medjool dates, pitted
- 1 cup raw macadamias
- 1 cup organic desiccated coconut
- 2 tablespoons coconut oil, melted
Caramel Filling
- 12 medjool dates, pitted
- 1 cup raw macadamias
- 1/2 cup coconut oil, melted
- 1/2 cup pure maple syrup
- 2 tablespoons tahini
- 2 teaspoons vanilla extract
- 1/3 cup water
Coconut Whipped Cream
- 3 cups coconut cream, placed in refrigerator overnight or for a minimum 6 hours
- 3 teaspoons vanilla extract
- 3 tablespoons pure maple syrup
Extra Ingredients
- 2 medium bananas, sliced
- 1-2 tablespoons raw cacao powder, for topping
Instructions
- To make the base, process the base ingredients in a high-speed blender or food processer until the mixture sticks together. Spoon the crust into a pie dish that is lined with cling wrap and press firmly, so that it is even around the base and edges. Place in the freezer overnight to set.
- To make the caramel layer, process all the ingredients in a high-speed blender until completely combined and smooth. You may need to add a little more water to help blend the ingredients.
- To make the coconut whipped cream, remove the cream from the can and add to blender with vanilla extract and maple syrup. Blend on high speed until the cream thickens. Alternatively, you can use a mixer or hand beater. Refrigerate until needed.
- When ready to serve, remove the base from the pie dish, add the caramel filling, then top with the sliced banana and then the coconut cream. Place in the refrigerator for 20 minutes to set. Remove from the refrigerator and sprinkle cacao powder over the top. Serve immediately.
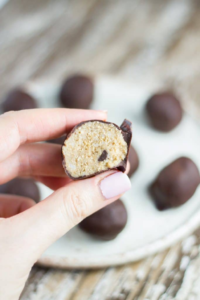
Chocolate Chip Cookie Dough Balls
- Author: Vanessa Vickery
- Prep Time: 30 minutes
- Cook Time: 0 minutes
- Total Time: 30 minutes
- Makes: 26
Ingredients
- 1/2 cup coconut oil or organic butter
- 3/4 cup coconut sugar
- 1/2 cup coconut milk (tinned)
- 1 tablespoon vanilla extract
- 1/2 cup coconut flour
- 1/2 cup dairy-free chocolate chips (or cacao nibs)
Chocolate Coating
- 1/4 cup coconut oil
- 1 tablespoon pure maple syrup or raw/organic honey
- 1/4 cup raw cacao powder
Instructions
- Add coconut oil (or butter), coconut sugar, coconut milk and vanilla to a large mixing bowl, mixing thoroughly until well combined. Stir in the coconut flour and then the chocolate chips.
- Using your fingers, roll mixture into small balls and place on a lined baking tray. Place in the freezer for 1 hour to harden.
- To make the chocolate coating, melt the coconut oil in a saucepan on low heat. Once melted, remove from heat, add the maple syrup, whisking briskly until well combined. Then add the cacao powder, stirring until well mixed through.
- Once the chocolate chip cookie dough balls are ready, coat with the chocolate mixture and place back on the lined baking tray. Use a spoon and a fork to coat them in the mixture and then to drain any excess.
- Place back in the freezer for a minimum 10 minutes to set. They are best kept in the freezer, just take them out a few minutes before serving.
Notes
The cook time does not include the time it takes for the cookie dough balls to set in the freezer.
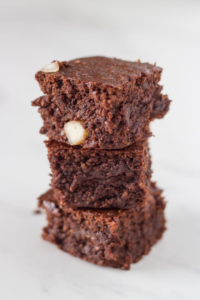
Chocolate Macadamia Fudge Brownies
- Prep Time: 10 minutes
- Cook Time: 30 minutes
- Total Time: 40 minutes
- Makes: 16
Description
Chocolate Macadamia Fudge Brownies. These brownies are absolutely yummy and basically melt in your mouth
Ingredients
- 1/2 cup coconut oil, melted
- 1/2 cup pure maple syrup
- 1 teaspoon vanilla extract
- 2 eggs
- 1 cup almond flour
- 1/2 cup raw cacao powder
- 1 teaspoon baking powder
- 1/4 teaspoon sea salt
- 1/2 cup macadamias
Instructions
- Pre-heat the oven to 175°C
- Add the coconut oil, maple syrup and vanilla extract to a medium sized bowl, stirring to combine. Then, add the eggs, mixing well to combine.
- Add the almond flour, cacao powder, baking powder and salt to a large mixing bowl, mixing well to combined
- Then combine the wet mixture with the dry mixture, stirring well to combine. Fold the macadamias into the mixture.
- Pour the brownie batter into a lined square baking pan (approximately 20cm x 20cm) and place in the oven for approximately 25 – 30 minutes.
- Remove from oven and let cool for 10 – 20 minutes. Slice into squares and keep stored in the fridge for up to 4 days.
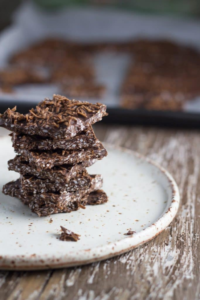
Coconut Rough
- Author: Vanessa Vickery
- Prep Time: 10 minutes
- Cook Time: 0 minutes
- Total Time: 10 minutes
- Makes: 30 pieces
Ingredients
- 1 + 1/2 cups shredded organic coconut
- 1/2 cup coconut oil
- 1/2 cup cacao powder
- 2 – 3 tablespoons pure maple syrup
Instructions
- Place shredded coconut in a fry pan on medium heat and cook for 5 minutes until lightly golden and toasted.
- To make the chocolate mixture, melt the coconut oil in a saucepan on low heat. Once melted, remove from heat, add the maple syrup, whisking briskly until well combined. Then add the cacao powder, stirring until well mixed through.
- Place the shredded coconut into the saucepan and stir through the chocolate mixture. Spread evenly on a lined baking tray and place in the freezer for 30 – 60 minutes to set.
- Slice in desired sized pieces and serve. Store in the freezer to keep it firm.
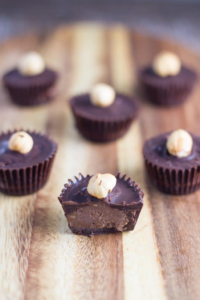
Ferrero Rocher Cups
- Author: Vanessa Vickery
- Prep Time: 45 minutes
- Cook Time: 0 minutes
- Total Time: 45 minutes
- Makes: 20
Ingredients
Hazelnut filling
- 100 grams raw hazelnuts
- 1.5 tablespoons raw cacao powder
- 4 tablespoons coconut milk
- 1 tablespoon organic maple syrup (or raw/organic honey)
- 1 teaspoon vanilla extract
Chocolate Coating
- 1/2 cup coconut oil
- 2 tablespoons organic maple syrup (or raw/organic honey)
- 1/2 cup raw cacao powder
Topping
- 20 toasted hazelnuts
Instructions
- To make the chocolate coating, melt the coconut oil in saucepan on low heat. Once melted, add the maple syrup (or honey), whisking until well combined. Then add the cacao powder, stirring well until well mixed through.
- Preheat oven to 180°C and line a baking tray with baking paper.
- Once the oven has heated, place the hazelnuts in a single layer on the baking tray and bake for about 5 to 8 minutes until the skins have darkened and are easy to remove. Rub the hazelnuts between your hands or in a tea towel to remove as much of the skins as possible. Don’t stress if you can’t get all the skin off. Place the hazelnuts into a high-speed blender and process until they have been processed into a smooth paste. Add in all the other ingredients and process until combined and smooth. Refrigerate for 30 minutes
- To make the Ferro Rocher’s cups, spoon 1 teaspoon chocolate into each liner and place in freezer for 10 minutes to set. Once set, next, spoon 1 teaspoon hazelnut mixture into each and smooth with the back of a spoon. Cover with chocolate and place hazelnut on top. Freeze for 1 hour.
- Store in the freezer. Allow to thaw slightly before eating.
Notes
The cook time does not include the time it takes for this recipe to set in the refrigerator.
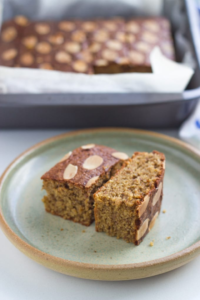
Flourless Almond and Lemon Cake
- Author: Vanessa Vickery
- Prep Time: 10 minutes
- Cook Time: 35 minutes
- Total Time: 45 minutes
- Makes: 18 slices
Ingredients
- 4 eggs
- 2 tablespoons lemon zest
- 1/2 cup coconut sugar
- 1 teaspoon vanilla extract
- 2 cups almond flour
- 1 teaspoon baking powder
- 1/2 teaspoon cardamom
- Flaked almonds for decorating
Instructions
- Pre-heat the oven to 180°C.
- Whisk together the eggs, lemon zest, coconut sugar and vanilla extract in a medium to large sized bowl. Next, whisk together the almond flour, baking powder and cardamom in a large bowl. Then add the wet mixture to the dry mixture, stirring until combined.
- Pour the mixture into a greased and line square baking pan and decorate with the flaked almonds. Place into the oven for 35 minutes to cook or until an inserted skewer withdraws clean.
- Allow to cool slightly in the baking pan before slicing.
- Can be served warm or cold.
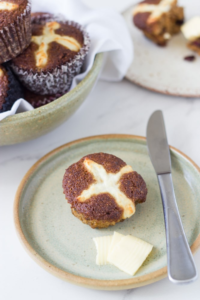
Gluten Free Hot Cross Buns
- Prep Time: 10 minutes
- Cook Time: 30 minutes
- Total Time: 40 minutes
- Makes: 12
Ingredients
- 1 + 1/2 cup almond flour
- 1/2 cup coconut flour
- 2 teaspoons baking soda
- 3 teaspoons cinnamon
- 2 teaspoons nutmeg
- 1/2 cup coconut sugar
- 1 + 1/2 cups organic dried fruit
- 4 eggs, whisked
- 1 cup almond milk
- 1/2 cup coconut oil
Crosses
- 1 egg whites
- 1 tablespoons coconut flour
Instructions
- Pre-heat your oven to 180°C and line a muffin tin with 12 large muffin cases.
- Combine the almond flour, coconut flour, baking soda and the dried spices to a large bowl. Next, add the coconut sugar and dried fruit and mix well to combine.
- Combine the whisked eggs, almond milk and coconut oil to another bowl. Then pour the wet mixture into the large mixing bowl and stir until well combined.
- Divide the mixture evenly into the muffin cases and smooth the tops with the back of a dessert spoon
- To make the crosses, add the egg whites and the coconut flour to a small bowl and mix until it forms a paste. Then, using two teaspoons or a piping bag, place a cross on the top of each bun.
- Place in the oven and cook for 25-30 minutes.
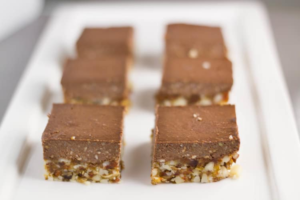
Raw Nutella Slice
- Author: Vanessa Vickery
- Prep Time: 30 minutes
- Cook Time: 0 minutes
- Total Time: 30 minutes
- Makes: 16 – 20
Ingredients
Base
- 24 medjool dates, pitted
- 200g macadamias
- 1/2 teaspoon sea salt
Nutella layer
- 200g raw hazelnuts
- 3 – 4 tablespoons cacao powder (depending on how strong you like your chocolate)
- 8 tablespoons coconut milk, tinned variety
- 2 tablespoons pure maple syrup
- 1 teaspoon vanilla extract
Instructions
- To make the base, add all ingredients to a food processor and process until well mixed and the macadamias are crushed. Add mixture to a lined tin, smooth out with a spoon and place in the freezer to set.
- Preheat oven to 180°C and line a baking tray with baking paper.
- To make the nutella layer, place the hazelnuts in a single layer on the baking tray and bake for about 5 to 8 minutes until the skins have darkened and are easy to remove.
- Rub the hazelnuts between your hands or in a tea towel to remove as much of the skins as possible. Don’t stress if you can’t get all the skin off.
- Place the hazelnuts into a high-speed blender and process until they form a smooth paste. Add in all the other ingredients and process until combined and smooth. Pour over base layer and place into freezer to set.
- Remove from the tin, slice straight away and store in an airtight container in the fridge or freezer (It stays firm in the freezer).
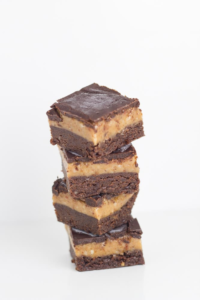
Raw Caramel Brownie Slice
- Prep Time: 30 minutes
- Cook Time: 0 minutes
- Total Time: 30 minutes
- Makes: 20 pieces
Description
This Raw Caramel Brownie Slice is gluten, dairy and refined sugar free (as always) and suitable for paleo and vegan lifestyles. There are three layers to this masterpiece, the chocolate brownie base, a gooey caramel layer and crunchy chocolate layer to top it off.
Ingredients
Brownie Base
- 2 cups walnuts
- 1 + 1/2 cups medjool dates, pitted
- 1/3 cup raw cacao powder
- 1 teaspoon vanilla paste (or extract)
- Pinch of sea salt
Caramel Layer
- 14 medjool dates, pitted
- 1 cup raw macadamias
- 1/2 cup pure maple syrup
- 2 teaspoons vanilla extract
Chocolate Layer
- 1/3 cup coconut oil
- 2 tablespoons pure maple syrup
- 1/3 cup raw cacao powder
Instructions
Brownie base:
Process the walnuts in a food processor until they resemble fine crumbs. Add the cacao powder, vanilla and sea salt and process until well combined. Then, add the dates and process until a sticky dough is formed. Spoon mixture into a lined square baking tin and smooth with the back of a spoon.
Caramel layer:
Process the macadamias in a food processor until they resemble fine crumbs, next add the medjool dates, maple syrup and vanilla extract and process until completely combined and smooth. Spoon the mixture on top of the brownie base and smooth with the back of a spoon.
Chocolate layer:
Melt the coconut oil in saucepan on low heat. Once melted, remove from heat and add the maple syrup, whisking briskly until well combined. Then add the cacao powder, stirring until well mixed through. Pour the chocolate on top of the caramel filling and make sure it is evenly spread. Place back into the freezer and let it set completely. You want to ensure that all layers are frozen, so it may take 2-3 hours.
Remove from the tin, slice straight away and store in an airtight container in the freezer
Notes
You may get some cracks in the chocolate. These should be minimised if you let the slice set in the freezer for 2-3 hours.
Cook time does not include the time it takes for the raw caramel brownie slice to freeze — approximately 2-3 hours.
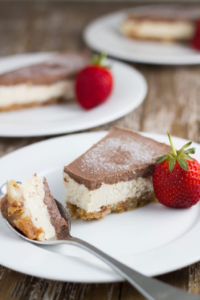
Raw Chocolate Caramel Pie
- Author: Vanessa Vickery
- Serves: 8 – 10
Ingredients
Crust
- 1 cup raw macadamias, soaked for a minimum 2 hours
- 12 medjool dates, seeds removed
- 1/2 teaspoon sea salt
Caramel Layer
- 1 + 1/2 cups macadamias, soaked for a minimum of 2 hours (preferably 4 hours for a smoother caramel)
- 1/2 cup coconut oil
- 3/4 cup maple syrup
- 1 teaspoon vanilla extract
Chocolate Layer
- 1/3 cup coconut oil
- 3 tablespoons organic maple syrup
- 1/3 cup organic cacao powder
- 1 cup coconut cream
- 2 tsp vanilla extract
Instructions
Crust
- Place macadamias, medjool dates and sea salt in your blender or food processor and blend until the nuts are crushed and the mixture holds together.
- Scoop out crust mixture and press firmly into a 20cm spring-form pan and smooth out with the back of a spoon. Rinse blender or food processor well.
Caramel Layer
- Warm the coconut oil in a small pot on low heat until liquid, add the maple syrup and whisk to combine.
- Place all ingredients into a high-speed blender and blend until very smooth.
- Pour mixture onto the crust and smooth with the back of a spoon or a spatula and place in the freezer to set for 60 minutes.
Chocolate Layer
- Add coconut oil to small saucepan on low heat and stir until melted.
- Remove from the heat and add the organic maple syrup, whisking briskly until well combined.
- Add the cacao powder, stirring until well combined.
- Add the coconut cream and vanilla extract and stir until well combined.
- Pour mixture onto the middle layer and place in the freezer to set (minimum 2 hours).
- Always keep in the freezer and remove 30 minutes before serving to allow it to thaw out a little.
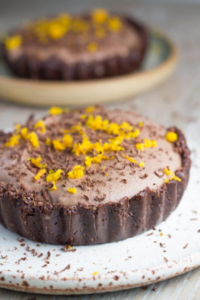
Raw Chocolate Orange Tart
- Author: Vanessa Vickery
- Prep Time: 15 minutes
- Cook Time: 0 minutes
- Total Time: 15 minutes
- Makes: 2 small tarts (approx 11cm diameter each)
Ingredients
Crust
- 3/4 cup macadamias
- 1/4 cup pitted dates
- 1/8 cup cacao powder
Filling (if using oranges)
- 1 cup macadamias
- 1/4 cup coconut oil
- 1/4 cup pure maple syrup
- 1/4 cup cacao powder
- 1 large orange juiced (approx. ½ cup)
- 1/4 teaspoon orange extract
- 1 avocado
Topping Options
- Dark Chocolate, grated (85% Cocoa)
- Orange rind, grated
Instructions
Crust
- Process the crust ingredients in a food processor or high-speed blender until it resembles fine crumbs and sticks together when pressed.
- Halve mixture and place into 2 small tart dishes (you may want to line them with cling wrap) and press down to form the base.
- Place in the freezer to set overnight or for a minimum of 4 hours.
Filling
- Place ingredients in a blender or food processor and process until the mixture is nice and smooth.
- Pour on top of the bases and place in freezer to set for 2 hours.
- Then add your preferred topping and serve.
Notes
- Store in the refrigerator to maintain the consistency of the filling.
- The cook time does not include the time it takes for the bases and filling to set in the freezer.
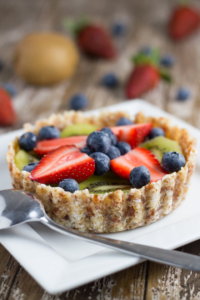
Raw Fruit Tart
- Author: Vanessa Vickery
- Prep Time: 20 minutes
- Cook Time: 0 minutes
- Total Time: 20 minutes
- Serves: 2
Ingredients
Base
- 6 medjool dates, pitted
- 1/2 cup raw macadamias
- 1/2 cup organic desiccated coconut
Coconut Whipped Cream
- 1 x 270ml can coconut cream, placed in refrigerator overnight or for a minimum 6 hours
- 1 teaspoon vanilla extract
- 1 tablespoon pure maple syrup
Everything else
- 2 kiwi fruits, peeled and sliced
- 4 strawberries, washed and sliced
- 1/3 cup blueberries, washed
- Optional – pulp from 1 passionfruit
Instructions
- To make the base, process the medjool dates, macadamias and desiccated coconut in a food processor or high-speed blender until it resembles fine crumbs and sticks together when pressed. Spoon the mixture into 2 small tart dishes (12cm) that are lined with cling wrap and press down to form the base. Place it in the freezer and freeze overnight.
- To make the coconut whipped cream, remove the cream from the can and add to blender with vanilla extract and maple syrup. Blend on high speed until the cream thickens. Alternatively, you can use a mixer or hand beater. Refrigerate until needed.
- When ready to serve, remove the base from the dishes and add the coconut cream and top with the fruit.
Notes
The cook time does not include the time it takes for the bases to firm up.
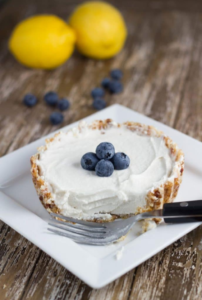
Raw Lemon Tart
Makes: 2 small tarts (approximately 13cm diameter)
Description
Raw Lemon Tart. The perfect dessert to serve to guests and they are gluten, dairy and refined sugar free.
Ingredients
Base
- 6 medjool dates, pits removed
- 1/2 cup macadamias, soaked for minimum 4 hours
- 1/2 cup desiccated coconut
Lemon Coconut Cream
- 1/2 cup macadamias, soaked for a minimum 4 hours
- 1 can coconut cream, placed in the fridge for a minimum 4 hours
- 1 lemon, juiced
- 1 tablespoon organic maple syrup
Topping
- Blueberries or your favourite fruit
Instructions
- Process the medjool dates, macadamias and desiccated coconut in a food processor or high-speed blender until it resembles fine crumbs and sticks together when pressed.
- Pour mixture into 2 small tart dishes lined with cling wrap and press down to form the base.
- Place it in the freezer for a minimum 4 hours, overnight preferably.
- To make the lemon coconut cream; scrape out the cream from the can (leaving the liquid) and place in a blender with the lemon juice, macadamias and organic maple syrup, blending for a few minutes until the mixture is nice and smooth.
- Place in the bowl and refrigerate for a minimum 4 hours (overnight is best).
- When ready to serve, remove the tarts from their pans, remove the cling wrap and place the lemon cream into each tart.
- Top with the blueberries.
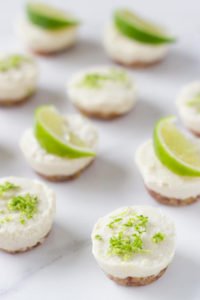
Raw Mini Lime Cheesecakes
- Prep Time: 25 minutes
- Cook Time: 0 minutes
- Total Time: 25 minutes
- Makes: 24 mini cheesecakes
Ingredients
Base
- 1/2 cup macadamias
- 6 medjool dates
- Pinch of sea salt
Cheesecake
- 1 cup macadamias, preferably soaked overnight or minimum 4 hours
- 1/2 cup coconut cream
- 1/4 cup pure maple syrup
- 1/4 cup lime juice
- Zest of 2 limes, grated
- 1/4 cup water
Toppings
- Lime zest or lime wedges
Instructions
- Process the base ingredients in your food processor or high-speed blender until it resembles crumbs and sticks together when pressed.
- Spoon mixture into a 24 mini muffin tray (see note below) and press down with the back of a teaspoon.
- Add the cheesecake ingredients to your food processor or high-speed blender and process until smooth.
- Add to the bases and smooth over with the back of a teaspoon and place into the freezer for 2 hours to set.
- Top with either grated lime zest or lime wedges
- Keep stored in the freezer in an airtight container
Notes
Use either a mini silicon muffin tray or cut out little strips of baking paper to use as tabs at the bottom of the regular mini muffin tray, to make it easier to remove them from the muffin tray.
Cook time does not include the time it takes for the raw mini lime cheesecakes to freeze — approximately 2 hours, depending on the temperature of your freezer.
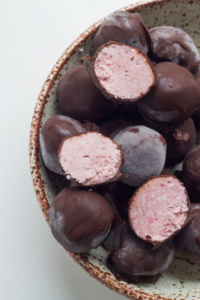
Strawberry Cream Truffles
- Author: Vanessa Vickery
- Prep Time: 30 minutes
- Cook Time: 0 minutes
- Total Time: 30 minutes
- Makes: 24 – 26
Ingredients
- 1 cup macadamias (or cashews)
- 1 + 1/2 cups organic shredded coconut
- 1 x 250 grams fresh organic strawberries
- 1/4 cup pure maple syrup
- 1/4 cup organic coconut oil
- 2 teaspoons vanilla paste (or extract)
Coating (enough to double coat)
- 1/2 cup coconut oil
- 2 tablespoons pure maple syrup
- 1/2 cup raw cacao powder
Instructions
- Add macadamias, shredded coconut, strawberries, maple syrup, coconut oil and vanilla paste to a high-speed blender (or food processor) and process until smooth. Place the mixture in the freezer to firm up, approximately 30 minutes (maybe a bit longer), as the mixture will be very soft. Just make sure you don’t leave too long, or it will be difficult to roll into the truffles.
- Remove from the freezer and roll the mixture into small balls and place on a lined baking tray. Then place back into the freezer to firm up a bit more, approximately 10- 20 minutes. This will make it easier to coat in the chocolate mixture. You want the truffles to be firm enough to coat in the chocolate mixture.
- To make the chocolate coating, melt the coconut oil in a saucepan on low heat. Once melted, remove from heat, add the maple syrup, whisking briskly until well combined. Then add the cacao powder, stirring until well mixed through.
- Once the strawberry cream truffles are ready, coat in the chocolate mixture. Once they are all coated, then do a second coating. I use either two spoons or a spoon and a fork to coat them in the chocolate mixture and drain off any excess.
- Place them back in the freezer for a minimum 10 minutes so that the chocolate sets. Keep stored in the refrigerator or freeze.
ENJOY!
